Cheatsheets, Tutorials, & All That
Table of Contents
- 1. PROLOGUE
- 2. PLATFORMS
- 3. TERMINAL
- 4. CODING+
- 5. MEDIA
- 6. APPLICATIONS+
- 7. NETWORKING+
1 PROLOGUE
1.1 Go to …
1.1.1 PLATFORMS
1.1.2 TERMINAL
1.1.3 CODING+
1.1.4 MEDIA
1.1.5 APPLICATIONS+
1.1.6 NETWORKING+
1.2 cowthinks.sh

1.3 Errors/Mistakes
Typos could be present. If you find any errors/mistakes, please send an email to sci.comp@pm.me. To send an encrypted email use the public PGP key (C90D 0A0F 301D 4A03 BA46 3207 7145 51F3 7EBF 6BE1) provided here: publickey.sci.comp@pm.me.asc. I appreciate your help.
1.4 Keyboard Shortcuts to Navigate This Web Page
| Key | Action |
|---|---|
n |
Next Tab |
p |
Previous Tab |
< |
Scroll to Top |
> |
Scroll to Bottom |
- |
Collapse All |
+ |
Expand All |
g |
Reload the Tab |
2 PLATFORMS
2.1 Back to PROLOGUE
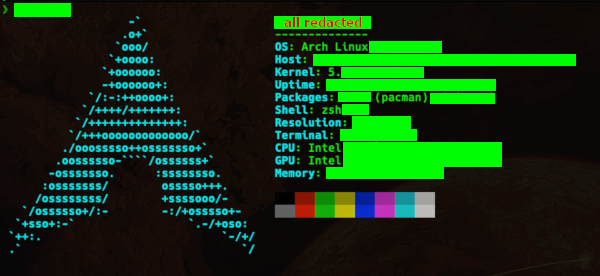
2.2 Arch Linux
2.2.1 neofetch
2.2.2 The Filesystem Hierarchy
- General Structure
- / : File system root
/boot/: Boot Partition/efi/: For separate EFI System Partition/etc/: System-specific configuration files/home/: Home directory for ordinary user/root/: Home directory for the super user (root)/srv/: Server stuff/tmp/: Storage for small temporary files
- / : File system root
- Runtime Data
/run/: Flushed on boot,tmpfsfile system/run/log/: System logs/run/user/: User specific runtime directories
- Vendor-Supplied Resources
/usr/: Operating system resources from vendor/usr/bin/: Binaries/executables accessed via$PATH/usr/include/: C/C++ API header files (system libraries)/usr/lib/: Static, private vendor stuff/usr/lib/arch-id/: Also called$libdir. Location for dynamic libraries/usr/share/: Shared between multiple packages/usr/share/doc: Operating system/system packages docs/usr/share/factory/etc/: Contains default configuration files from vendor/usr/share/factory/var/: For files in/var/
- Persistent Variable System Data
/var/: Writable persistent variable system data/var/cache/: Persistent system cache/var/lib/: Persistent system stuff/var/log/: Persistent system logs/var/spool/: Persistent system spool data: e.g., printer, mail queues, etc./var/tmp/: Large or persistent temporary files
- Virtual Kernel and API File Systems
/dev/: Root directory for device nodes/dev/shm/: POSIX shared memory segments/proc/: Virtual kernel file system: exposes process list, and others/proc/sys/: Exposes a number of kernel tunables/sys/: Virtual kernel file system: exposes discovered devices, and others
- Compatibility Symlinks
/bin/,/sbin/,/usr/sbin/: Compatibility symlinks to/usr/bin//lib/: Compatibility symlinks to/usr/lib//lib64/: Compatibility symlink to$libdir/var/run/: Compatibility symlink to/run/
- Home Directory
~/.cache/: Persistent user cache~/.config/: Configuration files~/.local/bin/: Executables part of user's$PATH~/.local/lib/: Static/private vendor data: compatible with all architectures~/.local/lib/arch-id/: Public dynamic libraries~/.local/share/: Shared between multiple packages
Source: https://jlk.fjfi.cvut.cz/arch/manpages/man/file-hierarchy.7
2.2.3 Basic Terminal Commands
- Check ID and Versions
# Display identity of the user
$ id

# Check Arch Linux version
$ hostnamectl

# Check all about kernel version
$ uname -a

# Check exact kernel version
$ uname -r

# Check installed linux kernel
$ pacman -Q linux
- Devices, Usage, Partitions
# List block devices
#    2 types of device files: block and character
#    block devices are like a block of data, used by volumes/partitions, etc.
#    character devices are used by mouse, keyboard, etc.
$ lsblk

# Print block devices as a list
$ lsblk -l

# Information about all partitions/volumes
$ sudo fdisk -l

# Memory usage
$ free -h

# Disk space usage in human-readable format
$ df -h

# Formatting a volume using mkfs
#    -t for file system type, e.g., ext3, ext2, etc4, vfat, etc.
#    /dev/DEVICE for device e.g., partition /dev/hda1 or /dev/sda1, etc.
$ sudo mkfs -t <filetype> </dev/DEVICE>
# Or,
$ sudo mkfs.<filtype> </dev/DEVICE>

# Examples
$ sudo mkfs -t ext4 /dev/sdb1
# Or,
$ sudo mkfs.ext4 /dev/sdb1

# Check (and interactively repair) all file systems except the root
$ fsck -AR -y
- Support for exFAT
# Install the packages required for exFAT support
$ sudo pacman -S exfat-utils
- Open Files
# Open a file in the default application
$ xdg-open <filename>

# Open a file in a specific application
$ <program name> <filename>
- Search
# Search a directory to find files by names
$ find <path to directory> -name <search criterion>
- Processes and Jobs
# List currently running processes
$ ps aux

# Kill a process using PID
$ kill -9 <pid>

# See parent(s) of defunct child processes
## Step 1:
$ ps -ef | grep defunct
## Step 2:
$ ps -ax | grep <ppid>

# List processes running in the background
$ jobs

# Restore a job to the foreground
$ fg %<job number>

# Restart a job in the background (paused by <CTRL>+<z>)
$ bg %<job number>
ls
# Colored output
$ ls --color=auto
- Change User/Host
# -------------------------------- #
# Additional Information:          #
# Enable/Disable the Root Account  #
# -------------------------------- #

# Get root privileges
$ sudo -i

# Enable the Root Account
$ sudo passwd root

# ==⌄== Virtual Terminal (VT) Stuff ============================⌄== #
# Log into any of the text-mode consoles (VTs) as **root**          #
# ----------------------------------------------------------------- #
#    * There may be up to 7 of the VTs by default                   #
#    * At least one has the X11 session (GUI Linux)                 #
#       ** X11 for version 11 of the X Window System core protocol  #
#       ** More X11 sessions for multiple logged-in users           #
#    * The rest of them are text-mode consoles                      #
# ----------------------------------------------------------------- #
# Press <CRTL>+<ALT>+F<N>                                           #
#     Replace <N> with any integer between 1 and 8                  #
#     Example: F2, F3, F4, F5, F6, and F7                           #
# ==^== Virtual Terminal Stuff =================================^== #

# Kill all processes owned by the user
~# killall -u <old username>
# Change username
~# usermod -l <new username> <old username>
# Change home directory name
~# usermod -d /home/<new username> -m <new username>
# Provide full name
~# usermod -c "<full new username>" <new username>
# Change group
~# groupmod -n <new username> <old username>
# Check new user id
~# id <new username>

# Add a user to the sudoers file
~# usermod -aG sudo <username>

# Switch to <username>
~# su - <username>

# Change password
$ passwd

# Change hostname editing the following files
$ sudo vi /etc/hostname
$ sudo vi /etc/hosts
# Reboot to see the changes

# Disable the Root Account
$ sudo passwd -dl root
2.2.4 Install/Execute
pacman
# Update the database
$ sudo pacman -Syy

# Update packages
$ sudo pacman -Su

# Install a package
$ sudo pacman -Sy <package name>

# Install a package, with base-devel
$ sudo pacman -Sy --needed base-devel <package name>

# Details about installed packages
$ pacman -Qi <package name>

# Uninstall
$ sudo pacman -R <package name>
- AUR (Arch User Repository) Helper:
aur
# Install an AUR Helper

# For aurutils
$ man aur
- Manual Installation of AUR Package
# Get the package from AUR (https://aur.archlinux.org/)
## For more: https://wiki.archlinux.org/index.php/Arch_User_Repository#Installing_packages
# Dowload, verify, and cd to directory with PKGBUILD file
$ makepkg -si
2.2.5 Applications
- VeraCrypt
- Install Using
pacman
# Install
$ sudo pacman -S veracrypt

# Uninstall
$ sudo pacman -R veracrypt
- Commands
# Mount a volume
#    -t for CLI
#    -k for --keyfiles: "" for none
#    --pim for PIM: 0 for none
#    --protect-hidden to write-protect a hidden volume: yes or no
#    --slot for slot number: <N> should be a positive integer (be reasonable!!!)
$ veracrypt -t -k "" --pim=0 --protect-hidden=<yes or no> --slot=<N> <path to volume>

# Example
$ veracrypt -t -k "" --pim=0 --protect-hidden=no --slot=2 /dev/sdb2
Enter mount directory [default]:
Enter password for /dev/sdb2:
Enter your user password or administrator password:
# Dismount a volume
$ veracrypt -d <path to volume>
- Install Using
- Feh Image Viewer
- Basic
fehCommands
# Help
$ feh -h

# Example (browse images in a specific directory)
## -g for --geometry: to fix the window size
## -d for --draw-filename : to show filename in the image window
## -S for --sort : to sort file by given <SORT_TYPE>, e.g., name, filename, etc.
$ feh -g 1600x900 -d -S filename <path to directory>
- Keyboard Shortcuts
- d : toggle
--draw-filename - f : toggle fullscreen
- g : toggle fixed geometry mode
- h : toggle pause/continue slideshow
- i : toggle
--info display - n or <SPC> or <RIGHT> : Next image
- p or <BCKSPC> or <LEFT> : Previous image
- <UP> : Zoom in
- <DOWN> : Zoom out
- / : Zoom to fit the window
- q or <ESC> : Quit
- d : toggle
- Basic
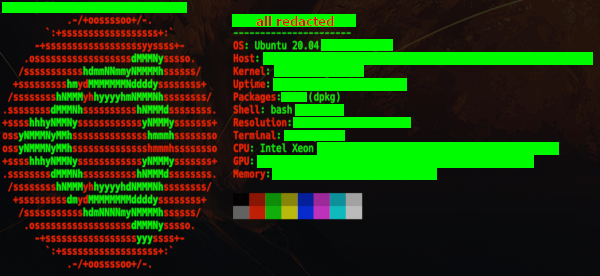
2.3 Ubuntu 20.04 LTS
2.3.1 neofetch
2.3.2 The Filesystem Hierarchy Standard (FHS) and Others
/bin/: basic programs/boot/: kernel and other files required to boot/dev/: device files/etc/: configuration files/home/: user's stuff/lib/: basic libraries/media/: removable devices (mount points)/mnt/: mount points (temporary)/opt/: for third-party applications/root/: root’s files/run/: volatile runtime non-persistent data (not part of the FHS at present)/sbin/: system programs/srv/: for hosted servers/tmp/: temporary files/usr/: applications
/usr/bin//usr/sbin//usr/lib//usr/share/: has architecture-independent data/usr/local/: for manual installations without overwriting dpkg stuff
/var/: variable data used by daemons/proc/: Specific to the Linux kernel, exports data to user space./sys/: Specific to the Linux kernel, exports data to user space.
Source: The Debian Administrator's Handbook
2.3.3 Release Upgrades
- From 18.04 LTS to 20.04 LTS
# Check "/etc/update-manager/release-upgrades" file
# To upgrade to long-term support versions make sure "Prompt=lts"
# Or, edit using the following command
$ sudo vim /etc/update-manager/release-upgrades

# After updating entire system
$ sudo do-release-upgrade
#  If no new release is available, install the latest development version
## For desktop, as opposed to server
$ sudo do-release-upgrade -d -m desktop

# Check the Ubuntu version after the upgrade
$ lsb_release -a
# Or,
$ cat /etc/lsb-release
2.3.4 Basic Terminal Commands
- Check ID and Versions
# Display identity of the user
$ id

# Check all about Ubuntu version
$ lsb_release -a

# Check exact Ubuntu version
$ lsb_release -r

# Check all about kernel version
$ uname -a

# Check exact kernel version
$ uname -r
- Find Hardware Devices Using
lshw
# The large list
$ sudo lshw

# A relatively short list
$ sudo lshw -short

# Create HTML/XML outputs
$ sudo lshw -html > <filename.html>
$ sudo lshw -xml > <filename.xml>

# List disks/partitions
#    Hard disks referred to as sda*
#    Notes
#        1 GB = 0.93132257461548 GiB
#        GB: unit symbol of Gigabyte
#        GiB: unit symbol of Gibibyte
$ sudo lshw -short | grep "volume"
- Devices, Usage, Partitions
# List block devices
#    2 types of device files: block and character
#    block devices are like a block of data, used by volumes/partitions, etc.
#    character devices are used by mouse, keyboard, etc.
$ lsblk

# Print block devices as a list
$ lsblk -l

# Show information about block devices
$ blkid

# Information about all partitions/volumes
$ sudo fdisk -l

# Memory usage
$ free -h

# Disk space usage in human-readable format
$ df -h

# Formatting a volume using mkfs
#    -t for file system type, e.g., ext3, ext2, etc4, vfat, etc.
#    /dev/DEVICE for device e.g., partition /dev/hda1 or /dev/sda1, etc.
$ sudo mkfs -t <filetype> </dev/DEVICE>
# Or,
$ sudo mkfs.<filtype> </dev/DEVICE>

# Examples
$ sudo mkfs -t ext4 /dev/sdb1
# Or,
$ sudo mkfs.ext4 /dev/sdb1

# Check (and interactively repair) all file systems except the root
$ fsck -AR -y
- Support for exFAT
# Add the universe package repository
$ sudo add-apt-repository universe

# Update the package index
$ sudo apt update

# Install the packages required for exFAT support
$ sudo apt install exfat-fuse exfat-utils
- Open Files
# Open a file in the default application
$ xdg-open <filename>

# Open a file in a specific application
$ <program name> <filename>
- Search
# Search a directory to find files by names
$ find <path to directory> -name <search criterion>
- Processes and Jobs
# List currently running processes
$ ps aux

# Kill a process using PID
$ kill -9 <pid>

# See parent(s) of defunct child processes
## Step 1:
$ ps -ef | grep defunct
## Step 2:
$ ps -ax | grep <ppid>

# List processes running in the background
$ jobs

# Restore a job to the foreground
$ fg %<job number>

# Restart a job in the background (paused by <CTRL>+<z>)
$ bg %<job number>
- Change User/Host
# -------------------------------- #
# Additional Information:          #
# Enable/Disable the Root Account  #
# -------------------------------- #

# Get root privileges
$ sudo -i

# Enable the Root Account
$ sudo passwd root

# ==⌄== Virtual Terminal (VT) Stuff ============================⌄== #
# Log into any of the text-mode consoles (VTs) as **root**          #
# ----------------------------------------------------------------- #
#    * There may be up to 7 of the VTs by default                   #
#    * At least one has the X11 session (GUI Linux)                 #
#       ** X11 for version 11 of the X Window System core protocol  #
#       ** More X11 sessions for multiple logged-in users           #
#    * The rest of them are text-mode consoles                      #
# ----------------------------------------------------------------- #
# Press <CRTL>+<ALT>+F<N>                                           #
#     Replace <N> with any integer between 1 and 8                  #
#     Example: F2, F3, F4, F5, F6, and F7                           #
# ==^== Virtual Terminal Stuff =================================^== #

# Kill all processes owned by the user
~# killall -u <old username>
# Change username
~# usermod -l <new username> <old username>
# Change home directory name
~# usermod -d /home/<new username> -m <new username>
# Provide full name
~# usermod -c "<full new username>" <new username>
# Change group
~# groupmod -n <new username> <old username>
# Check new user id
~# id <new username>

# Add a user to the sudoers file
~# usermod -aG sudo <username>

# Switch to <username>
~# su - <username>

# Change password
$ passwd

# Change hostname editing the following files
$ sudo vi /etc/hostname
$ sudo vi /etc/hosts
# Reboot to see the changes

# Disable the Root Account
$ sudo passwd -dl root
2.3.5 Dealing with Installation Issues
- Using
aptorapt-get
# Look for missing updates
$ sudo apt update --fix-missing
# Force install to repair broken packages, and/or fix missing dependencies
$ sudo apt install -f
# Or, remove the package, barring linux-* ones
$ sudo apt remove <package-name>

# SPECIAL NOTE
# apt is a subset of commonly used apt-get or apt-cache commands
- Using Package Database (
dpkg)
# Reconfigure broken/partially configured packages
$ sudo dpkg --configure -a

# If locked out of dpkg
$ sudo rm /var/lib/apt/lists/lock
# Also, you may want to do this
$ sudo rm /var/cache/apt/archives/lock

# If all else fails
$ ls -l /var/lib/dpkg/info | grep -i <problematic-file-or-whatever>
# Remove <problematic-file-or-whatever>
$ rm /var/lib/dpkg/info/<problematic-file-or-whatever>
2.3.6 Install/Execute
- Debian Packages
$ sudo dpkg -i <package-name.deb>
$ sudo apt-get install -f

# Uninstall
$ sudo dpkg --remove <package-name>
- AppImage Packages
# Make it executable
# u for user
$ chmod u+x <package-name.AppImage>
# Execute
$ ./<package-name.AppImage>
- Binary Packages
# Make it executable
# a for all
$ chmod a+x <package-name.bin>
# Execute
$ ./<package-name.bin>
- Flatpak Installations
- Flatpak Support
# Install Flatpak if not already installed
$ sudo apt install flatpak

# To update already installed applications
$ flatpak update

# Uninstall applications
$ flatpak uninstall

# List running Flatpak instances
$ flatpak ps
- Enable Flathub repository
# Enable Flathub repository
$ flatpak remote-add --user --if-not-exists flathub https://flathub.org/repo/flathub.flatpakrepo

# Modify the remote Flathub repository
$ flatpak remote-modify --collection-id=org.flathub.Stable flathub
- Cozy (Audiobook Player)
# Install Cozy audiobook player
$ flatpak install --user flathub com.github.geigi.cozy

# Run Cozy
$ flatpak run com.github.geigi.cozy
# Or, create an alias "cozy"
#    Add the following line in your ~/.bash_aliases
#    alias cozy="flatpak run com.github.geigi.cozy &"
# Run Cozy in the background using the alias
$ cozy
- GIMP
# Install GIMP 2.10
$ flatpak install https://flathub.org/repo/appstream/org.gimp.GIMP.flatpakref

# Run GIMP
$ flatpak run org.gimp.GIMP//stable
# Or, create an alias "gimp"
#    Add the following line in your ~/.bash_aliases
#    alias gimp="flatpak run org.gimp.GIMP//stable &"
# Run GIMP in the background using the alias
$ gimp
- Flatpak Support
- Install GNOME Tweaks and Shell Extensions
# Enable the universe repository first, if not already enabled
$ sudo add-apt-repository universe

# Install GNOME Tweaks
$ sudo apt install gnome-tweak-tool

# Install GNOME shell extensions
#    First, install GNOME Tweaks
$ sudo apt install gnome-shell-extensions

# Need to install this as well
$ sudo apt-get install chrome-gnome-shell

# Check GNOME shell version
$ gnome-shell --version
- Uninstall (
remove,autoremove,purge)
# Simply uninstall
$ sudo add-apt-repository universe
2.3.7 GUI Enviroment(s)
# Enable the universe repository first, if not already enabled
$ sudo add-apt-repository universe
2.3.8 Applications
- VeraCrypt
- Install Using PPA Repositories
$ sudo add-apt-repository ppa:unit193/encryption
$ sudo apt-get update
$ sudo apt install veracrypt

# Uninstall
# Open Software and Updates, and go to Other Software
- Commands
# Mount a volume
#    -t for CLI
#    -k for --keyfiles: "" for none
#    --pim for PIM: 0 for none
#    --protect-hidden to write-protect a hidden volume: yes or no
#    --slot for slot number: <N> should be a positive integer (be reasonable!!!)
$ veracrypt -t -k "" --pim=0 --protect-hidden=<yes or no> --slot=<N> <path to volume>

# Example
$ veracrypt -t -k "" --pim=0 --protect-hidden=no --slot=2 /dev/sdb2
Enter mount directory [default]:
Enter password for /dev/sdb2:
Enter your user password or administrator password:
# Dismount a volume
$ veracrypt -d <path to volume>
- Install Using PPA Repositories
- KeePassXC
- Spreadsheets
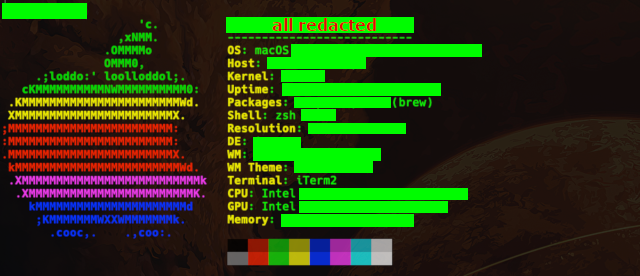
2.4 macOS
2.4.1 neofetch
2.4.2 Basic Terminal Commands
df
# List currenty mounted disks/volumes
$ df -h
- Disk Utility (
diskutil)
- Basic Commands
# List local disks
$ diskutil list

# Mount/Unmount the entire disk (including all volumes/partitions)
# <disk identifier> can be obtained from:
#    $ diskutil info <known disk name from $ diskutil list> | grep Device
$ diskutil mountDisk <disk identifier>
$ diskutil unmountDisk <disk identifier>

# Mount/Unmount a single volume/partition
$ diskutil mount <disk identifier>
$ diskutil unmount <disk identifier>
# An example of mounting a single volume/partition
$ diskutil mount disk3s2

# Rename a single volume
# File system-specific alphabet and length restrictions apply
$ diskutil rename <old name> <new name>

# List formattable file systems
$ diskutil listFilesystems
- Erase/Reformat
# Erase a whole disk
#    <file system> from $ diskutil listFilesystems
#    <disk name> is your choice
#    <disk identifier> can be obtained from:
#    $ diskutil info <known disk name form $ diskutil list> | grep Device
$ diskutil eraseDisk <file system> <disk name> <disk identifier>

# Erase a volume/partition
# Change "eraseDisk" to "eraseVolume"
$ diskutil eraseVolume <file system> <volume name> <disk identifier>

# Erase an existing volume
$ diskutil reformat <volume name>
- Disk Partition
# Create a single volume/partition
# <partition scheme> refers to the following:
#    GPT—GUID Partition Table
#    APM—Apple Partition Map
#    MBR—Master Boot Records
# <file system> can be obtained from:
#    $ diskutil listFilesystems
# <partition/volume name> is your choice
# 0b (for partition size) is for using all available free space
#    However, any size can be specified, e.g.,
#    <N>b (bytes), <N>m (megabytes), <N>g (gigabytes), <N>t (terabytes), etc.
#    Replace <N> with a positive integer
#    The maximum value (of <N>) depends on the free space available
$ diskutil partitionDisk <disk identifier> <partition scheme> <file system> <partition/volume name> 0b

# Create multiple volumes/partitions
# <N>b could be <N>m or <N>g or <N>t, etc.
$ diskutil partitionDisk <disk identifier> <partition scheme> <file system> <first volume name> <N>b  <file system> <second volume name> <N>b <file system> <third volume name> <N>b <file system> <fourth volume name> <N>b <file system> <nth volume name> 0b

# Split an existing partition
$ diskutil splitPartition <disk identifier> <file system> <first volume name> <N>b  <file system> <second volume name> <N>b <file system> <nth volume name> 0b

# Merge existing partitions
$ diskutil mergePartitions <file system> <volume name> {starting disk identifier in range} {ending disk identifier in range}

# An example of merging existing partitions using diskutil
$ diskutil mergePartitions HFS+ partname disk4s1 disk4s5
- Basic Commands
- Convert/Copy a File with
dd
# Copy a file to a disk/volume, e.g., <device node>, obtained from:
#    $ diskutil info <device name> | grep Device
#    UNMOUNT the volume
$ sudo dd if=<path to file> of=<device node> bs=1m
# bs refers to block size

# An example (create a bootable flash drive)
# Copy an ISO file to a disk
$ sudo dd if=~/Downloads/ubuntu-18.04.3-desktop-amd64.iso of=/dev/disk2 bs=1m
2.4.3 Install/Execute
- Xcode Command Line Tools
$ xcode-select --install
- KeePassXC
Using Homebrew Cask
$ brew cask install keepassxc

# You can also use the binary bundle from https://keepassxc.org/download/#mac
# Always verify using PGP signature or sha256sum, or both

# Update
$ brew cask upgrade keepassxc

# Uninstall
$ brew cask uninstall keepassxc
- KDE on macOS
Install Using Homebrew
# Add KDE frameworks tap
$ brew tap kde-mac/kde
$ $(brew --repo kde-mac/kde)/tools/do-caveats.sh

# Install KDE Frameworks 5 packages individually
$ brew install kde-mac/kde/kf5-karchive
# Install all KDE Frameworks 5 packages
$ $(brew --repo kde-mac/kde)/tools/install.sh

# Uninstall all KDE Frameworks 5 packages
$ $(brew --repo kde-mac/kde)/tools/uninstall.sh
Source: homebrew-kde on GitHub
Issue #293: Installation fails on Mac OS X Sierra
Install Okular Using KDE on macOS
# Install Okular
$ brew install kde-mac/kde/okular
Go to Okular Homepage
2.4.4 Security
- Yubikey Stuff
- FileVault Configuration
# Disable FileVault decryption at boot and allow PIV login
# Source URL: https://support.yubico.com/support/solutions/articles/15000006468
$ sudo defaults write /Library/Preferences/com.apple.loginwindow DisableFDEAutoLogin -bool YES
- Yubikey and GPG
- Yubikey Manager (
ykman) - Add path to
ykmanby adding the following line to ~/.bashrc:
export PATH=/Applications/YubiKey\ Manager.app/Contents/MacOS/:$PATH
# Explore your options
$ ykman openpgp -h
- Set Touch Authentication
# Enable touch authentication
$ ykman openpgp set-touch sig on
$ ykman openpgp set-touch aut on
$ ykman openpgp set-touch enc on
- Edit PIN, Admin PIN
# Display information
$ gpg --card-status

# Edit to set PINs
$ gpg --edit-card

# Set 6-digit PIN
gpg/card> passwd

# Set 8-digit PIN
gpg/card> admin
gpg/card> passwd

# For help
gpg/card> help

# Quit
gpg/card> quit
- Moving GPG Keys to Yubikey
# The sequence could be wrong, but you get the idea...
$ gpg --edit-key <key id>
gpg> toggle
gpg> keytocard
# Select 1 for Signature key
gpg> key 1
gpg> keytocard
# Select 2 for Encryption key
gpg> key 1
gpg> key 2
gpg> keytocard
# Select 3 for Authentication key
gpg> key 2
gpg> key 3
gpg> keytocard
gpg> save

# Check card status to display updated information
$ gpg --card-status
- Delete Secret Key Stub from the Keyring
# Find the keygrip associated with the secret key
$ gpg --with-keygrip -k <key id>

# Find the KEY file (created by the gpg-agent) associated w/ the keygrip
#    The file should be of this form: <keygrip>.key
$ ls ~/.gnupg/private-keys-v1.d/<keygrip>*
# Delete <keygrip>.key
#   AVOID using rm (USE something like trash-cli)
#   Create an alias del for something like trash-put
$ del ~/.gnupg/private-keys-v1.d/<keygrip>.key
- Reset OpenPGP Applet on the YubiKey
Permanently Deletes Existing GPG/PGP Keys from the Yubikey
# Insert the YubiKey
$ ykman openpgp reset
# Type y
Resetting OpenPGP data, don't remove your YubiKey...
Success! All data has been cleared and default PINs are set.
PIN:         123456
Reset code:  NOT SET
Admin PIN:   12345678
- Yubikey Manager (
- FileVault Configuration
3 TERMINAL
3.1 Back to PROLOGUE
3.2 Basic Commands
3.2.1 Change Shell
# Print current shell
$ echo $0

# List shells
$ chsh -l

# Change shell
$ chsh -s <path to shell>
## Examples
$ chsh -s /usr/bin/bash
$ chsh -s /usr/bin/zsh
3.2.2 Unix-Like File System Permissions
Check
$ ls -lah

# Following flags show the file types and permissions
## -rwxrwxrwx
## drwxrwxrwx
## crwxrwxrwx
## brwxrwxrwx

## First character represents the type of file
## "-" for ordinary files
## "d" for directories
## "c" for character device files, and
## "d" for block device files

## "rwx" repeats for "user", "group", and "other (world)" permissions
## "-" replaces "r", "w", and "x" when relevant permission is not granted
- 3-Level Access
| Access Level | Symbol | In Octal |
|---|---|---|
| Read | r |
4 |
| Write | w |
2 |
| Execute | x |
1 |
- Four Access Classes
| Access Class | Symbol |
|---|---|
user |
u |
group |
g |
other (world) |
o |
all (u, g, and o) |
a |
- Operators
| Access | Symbol |
|---|---|
| Add | + |
| Remove | - |
| Exact | = |
Change mode of a specific file (access levels):
chmod
- The numeric (octal) method involves a combination 3 digits: first digit corresponds to the user (u), second one to group (g), and the last one to others (o)
Access (In Octal) Breakup (In Octal) Access (In Symbols) 74+2+1rwx64+2+0rw-54+0+1r-x44+0+0r--Example (Numeric)
$ chmod 644 <filename>
$ chmod 755 <directory-name>
Example (Symbolic)
$ chmod a+x <file-or-directory-name>
$ chmod u-w+x <file-or-directory-name>

# No access class means all classes (a)
$ chmod +x <file-or-directory-name>

# Including more than one access class
$ chmod go+wx <file-or-directory-name>

# Apply changes recursively in all subdirectories
$ chmod -R go+wx <file-or-directory-name>
- The numeric (octal) method involves a combination 3 digits: first digit corresponds to the user (u), second one to group (g), and the last one to others (o)
- Change owner of a specific file:
chown
Example
$ chown <username> <file-or-directory-name>
- Change group of a specific file:
chgrp
Example
$ chgrp <groupname> <file-or-directory-name>
Mask (turn off) permission bits of a specific file/directory:
umask
umaskNOTES
Octal to binary
Octal Digit In Binary 00001001201030114100510161107111- Default file permissions:
666
Permissions (In Octal) Permissions (In Binary) Ordinary files 666110 110 110umaskmode022000 010 010(1negates/blocks1,0stays neutral)Changed mode 644110 100 100- Default directory permissions:
777
Permissions (In Octal) Permissions (In Binary) Directory 777111 111 111umaskmode022000 010 010(1negates/blocks1,0stays neutral)Changed mode 755111 101 101
Example
$ umask 022
3.3 Terminal Multiplexer: tmux
3.3.1 Prefix
- <prefix> is <CTRL> + b
3.3.2 Pane/Window Actions
- Split window/pane vertically
- <prefix> %
- <prefix> %
- Split window/pane horizontally
- <prefix> "
- <prefix> "
- Move current pane left/right
- LEFT: <prefix> {
- RIGHT: <prefix> }
- LEFT: <prefix> {
- Switch to window <N>
- <prefix> <N>
- <prefix> <N>
- Swapping window positions:
- <prefix> + o
- <prefix> + o
- Numbering tmux windows
- <prefix> q
- <prefix> q
- Select a pane
- <prefix> q and then the relevant pane <number>
- <prefix> q and then the relevant pane <number>
- Scrolling inside a tmux pane
- <prefix> [ and then arrow keys to go up and down
- <prefix> [ and then arrow keys to go up and down
- Toggle pane zoom
- <prefix> z
- <prefix> z
- Kill current window
- <prefix> x
- <prefix> x
3.3.3 Resize tmux Panes
- <prefix> : (colon)
# Assuming that you've hit <CTRL> + b and : to get to the command prompt
:resize-pane -L
## More
:resize-pane -D (Resizes the current pane down)
:resize-pane -U (Resizes the current pane upward)
:resize-pane -L (Resizes the current pane left)
:resize-pane -R (Resizes the current pane right)
:resize-pane -D 10 (Resizes the current pane down by 10 cells)
:resize-pane -U 10 (Resizes the current pane upward by 10 cells)
:resize-pane -L 10 (Resizes the current pane left by 10 cells)
:resize-pane -R 10 (Resizes the current pane right by 10 cells)
3.3.4 tmux Sessions
- Start new with session name:
$ tmux new -s mysessionname
- Detach tmux (exit back to normal terminal)
- <prefix> d
- <prefix> d
- Attach:
$ tmux a -t #(or at, or attach)
- Attach to named session
$ tmux a -t mysessionname
- List sessions:
$ tmux ls
- Kill a named session:
$ tmux kill-session -t mysessionname
- Kill all the tmux sessions
$ tmux ls | grep : | cut -d. -f1 | awk '{print substr($1, 0, length($1)-1)}' | xargs kill
3.3.5 tmux Windows
- Create window
- <prefix> c
- <prefix> c
- List windows
- <prefix> w
- <prefix> w
- Next window
- <prefix> n
- <prefix> n
- Previous window
- <prefix> p
- <prefix> p
- Find window
- <prefix> f
- <prefix> f
- Name window
- <prefix> ,
- <prefix> ,
- Kill window
- <prefix> &
- <prefix> &
3.4 Terminal Multiplexer: screen
3.4.1 Prefix
- <prefix> is <CTRL> + a
3.4.2 Create screen Sessions
- Create a new screen session
- <prefix> then c
- <prefix> then c
- Creates a session with a name
$ screen -S name- Name can be used to reattach at a later stage
3.4.3 Screen Session with Logs
$ screen -L
- -L turns on automatic output logging for the windows
- Output is saved to screenlog.<N> file
- Name logfile
$ less -r /home/<username>/screenlog.<N>$ cat /home/<username>/screenlog.<N>
- Name logfile
- -L turns on automatic output logging for the windows
- Toggle to save logs into screenlog.<N> file.
- <prefix> + H
- <prefix> + H
3.4.4 Scrolling
<prefix> then ESC
- Press the <Up> and <Down> arrow keys, or
- the <Page Up> and <Page Down> keys
- Press <Esc> to exit scroll back mode (copy mode)
- Press <Esc> to exit scroll back mode (copy mode)
- Press the <Up> and <Down> arrow keys, or
3.4.5 Split Terminal Window Using screen
- Vertically:
- <prefix> then <SHFT> + \ (meaning |)
- <prefix> then <SHFT> + \ (meaning |)
- Horizontally:
- <prefix> then <SHFT> + s (meaning S)
- <prefix> then <SHFT> + s (meaning S)
3.4.6 Movement Between Screens
- Move between screens
- <prefix> then <TAB>
- <prefix> then <TAB>
3.4.7 Attach/Detach screen Sessions
- Detach from the current screen session you are in
- <prefix> then d
- <prefix> then d
Remote detach
- screen is running in another terminal
$ screen -d <SCREENID>
- screen is running in another terminal
- List all screen sessions
$ screen -ls
- Attaches to session (for only one available session)
$ screen -r
- Attaches to a specific screen session
$ screen -r <SCREENID>
- Attaches to specific session by its given name
$ screen -r <session name>
3.4.8 Kill/Lock screen Sessions
- Kill a screen
- <prefix> then <SHFT> + x (meaning X)
- <prefix> then <SHFT> + x (meaning X)
- Kill the attached screen session
- <prefix> then k
- <prefix> then k
Kill the attached screen session using <SCREENID>
$ screen -X -S <SCREENID> quit
$ screen -S <SCREENID> -X quit
- Lock screen session
- <prefix> then x
- <prefix> then x
3.5 Text Editors
3.5.1 Vim
- My ~/.vimrc
- A Vim Cheatsheet Provided by rtorr
- Comment/Uncomment
- Comment Out a Block of Code/Text
Step 1: Go to the beginning of the line, and press <CTRL>+<v>
Step 2: Press <j> (N number of times for commenting out N number of lines)
Step 3: Press <SHIFT>+<i>
Step 4: Type the comment character(s), with or without space(s)
Step 5: Hit <ESC>
- Uncomment a Block of Code/Text
Step 1: Go to the beginning of the line, and press <CTRL>+<v>
Step 2: Press <j> (N number of times for uncommenting N number of lines)
Step 3: (IF NEEDED) Press <l> (N number of times for selecting N characters, from left to right)
Step 4: Press <x>
- Comment Out a Block of Code/Text
- Movements
- Move forward half-screen
- <CTRL> + D
- <CTRL> + D
- Move backward half-screen
- <CTRL> + U
- <CTRL> + U
- Jump <N> number of lines
- :+N
- Example:
- :+10
- :+10
- :+N
- Move forward half-screen
- Switching Case of Characters
- Toggle case "Morning" to "MoRNIng" with g~ then a movement
- Uppercase "Morning" to "MORNING" with gU then a movement
- Lowercase "Morning" to "morning" with gu then a movement
- Toggle case "Morning" to "MoRNIng" with g~ then a movement
- Toggle Terminal Vim Transparent Background
- <CTRL> + t
- <CTRL> + t
- Search and Replace
- For global search requiring confirmation, type the following in the : prompt
%s/<find pattern>/<replacement pattern>/gc
- For global search requiring confirmation, type the following in the : prompt
3.5.3 Org-mode
- Folding (Evil Mode)
- Enter insert mode:
i - <CTRL> +
i - Can repeat "<CTRL> +
i" up to n times
- Enter insert mode:
- Export to PDF (Evil Mode)
- 1: <CTRL> +
c - 2: <CTRL> +
e - 3:
l - 4:
p
- 1: <CTRL> +
- Export to HTML (Evil Mode)
- 1: <CTRL> +
c - 2: <CTRL> +
e - 3:
h - 4:
h
- 1: <CTRL> +
3.6 Backups
3.6.1 Compression/Extraction
- *.tar.*
# tar comes for "Tape ARchive"
# Archive to *.tar
$ tar -cf <archive-name.tar> <item1-to-archive> <item2-to-archive>
# ".tar" involves no compression:
#   -c for --create: create a new archive
#   -f for --file : read/write archive from/to the specified file

$ tar -czf <archive-name.tar.gz> <item-to-compress>
# Compress to *.tar.gz
#   -c for --create: create a new archive
#   -z for --gunzip, --gzip: compress with gzip (c mode only)
#   -f for --file : read/write archive from/to the specified file
$ tar -czf <archive-name.tar.gz> <item-to-compress>

# Example
$ tar -czf jpegarchive.tar.gz /path/to/images/*.jpeg

# Compress to *.tar.xz
#   -J for --xz : compress with xz
$ tar -cJf <archivename.tar.xz> <item-to-compress>

# Compress to *.tbz or *.tar.bz2
$ tar -cjf <archive-name.tar.bz2> <item-to-compress>

# Extract *.tar
$ tar -xf <archive-name.tar>
#   -x for --extract: extract from the archive
#   -f for --file : read/write archive from/to the specified file

# Extract to a specific directory
$ tar -xf <archive-name.tar> -C <path-to-directory>

# Extract *.tar.gz or *.tgz
#   -x to extract from the archive
#   -z for --gunzip, --gzip: uncompress with gzip (c mode only)
$ tar -xzf <archive-name.tar.gz>

# Extract *.tar.xz
$ tar -xJf <archive-name.tar.xz>

# Extract to a specific directory
$ tar -xJf <archive-name.tar.xz> -C <path-to-directory>

# Extract a bzip2 tar file (.tbz or .tar.bz2)
$ tar -xjf <archive-name.tar.bz2>

# ---⌄--⌄--⌄--⌄--⌄--⌄--⌄--⌄--⌄--⌄--⌄--⌄--⌄---#
# In all cases use -v to enable VERBOSE mode #
# ---^--^--^--^--^--^--^--^--^--^--^--^--^---#

# Check file size
$ du -sh <archive-name.tar.gz>
- *.zip
# Compress to *.zip
$ zip <directory-name.zip> <path to directory>

# Extract *.zip to a specific directory
$ unzip <directory-name.zip> -d <path to directory>
3.6.2 rsync
# Copy with rsync
#    -z for compression
#    -a for archive---for recursion and preserving almost everything
#       for multiply-linked files must separately specify -H
#    -v for verbose
#    -h for human-readable
$ rsync -zavh <path to directory to be copied> <destination path>
# Or,
$ rsync -zavh --progress --delete-before --exclude="*.icloud" --exclude=".DS_Store" --exclude=".Trash/" <path to directory to be copied> <destination path>
3.6.3 Restic
- Documentation
- With Backblaze B2 on Ubuntu
# Initializing Restic Repository

##1: To initialize Restic repository
$ restic -r b2:<name of backup repo> init

##2: To back up home directory or ~
$ restic -r b2:<name of backup repo> backup ~

##3: To view the snapshot(s) you now have stored on B2
$ restic -r b2:<name of backup repo> snapshots

# Restoring Restic Backups

##1: To restore your backup
$ restic -r b2:<name of backup repo> restore

## Specify which snapshot you wish to restore and where you want it to be put with the restore and the -t parameters
$ restic -r b2:<name of backup repo> restore <snapshotID> -t <path to restore location>

# Backup Repo Keys

## List backup repo keys
$ restic -r b2:<name of backup repo> key list

## Change backup repo keys
### First, unlock the backup repo
$ restic -r b2:<name of backup repo> unlock
### Then
$ restic -r b2:<name of backup repo> key passwd

## Add backup repo keys
$ restic -r b2:<name of backup repo> key add

## Remove backup repo keys
$ restic -r b2:<name of backup repo> key remove
4 CODING+
4.1 Back to PROLOGUE
4.2 Scripting
4.2.1 Bash
Link(s) not available at this time
4.2.2 AWK
Link(s) not available at this time
4.2.3 Sed
Link(s) not available at this time
4.2.4 Perl
Link(s) not available at this time
4.2.5 Python
Link(s) not available at this time
4.2.6 Regular Expressions
Link(s) not available at this time
4.3 Coding
4.3.1 Why Fortran?
4.3.2 Fortran
Link(s) not available at this time
4.4 High Performance Computing (HPC)
4.4.1 HPC Basics
Link(s) not available at this time
4.4.2 Job Scheduling
- Portable Batch System (PBS)
- Link(s) not available at this time
- Link(s) not available at this time
- Slurm Workload Manager (Slurm)
- Link(s) not available at this time
- Link(s) not available at this time
4.4.3 MPI
Link(s) not available at this time
4.4.4 OpenMP
Link(s) not available at this time
4.4.5 OpenACC
Link(s) not available at this time
5 MEDIA
5.1 Back to PROLOGUE
5.2 Figures and Plots
5.2.1 Xmgrace
- Flip Axis
- Steps (works on Grace-5.1.25)
- Click “Data” from the menu bar
- Select “Transformations”
- Select “Geometric transforms…”
- Select the set(s) or “All sets”
- Enter “90.0” in the “Rotation (degrees)” field
- Enter “-1.0” in the “Scale X” field
- Click Accept
- Click Close
- Autoscale graph (you may use the “AS” tab from the toolbar)
- Done!
- Click “Data” from the menu bar
- Steps (works on Grace-5.1.25)
5.3 Visuals/Graphics
5.3.1 GIMP
- Delete Background to Transparent
- With the Fuzzy Select Tool (FST)
- The FST icon looks like a magic wand (!)
- Select the FST with <u> (works on macOS)
- Make your selection
- Use <SHFT> key to include more selections
- Hit delete
- Or, do Edit > Clear (works on macOS)
- Done!
- The FST icon looks like a magic wand (!)
- With the Fuzzy Select Tool (FST)
- Crop (on macOS)
- Tools > Transform Tools > Crop
- Make selection
- Keep cursor inside the selection, then hit <ENTER>
- Done!
- Tools > Transform Tools > Crop
6 APPLICATIONS+
6.1 Back to PROLOGUE
6.2 LaTeX Stuff
6.2.1 Overleaf Stuff
6.2.2 Export to PDF
pdflatex
# Using pdflatex
$ pdflatex <filename.tex>
$ bibtex <filename>
# $ bibtex for-multiple-bibliography.aux
$ pdflatex <filename.tex>
$ pdflatex <filename.tex>
xelatex
# Using xelatex
# For fontspec package requiring XeTeX or LuaTeX
$ xelatex <filename.tex>
$ bibtex <filename>
# $ bibtex for-multiple-bibliography.aux
$ xelatex <filename.tex>
$ xelatex <filename.tex>
6.3 Git/GiitHub Stuff
6.3.1 Git Configuration
# Set a global username
$ git config --global user.name "<user name>"

# Set a global email address
git config --global user.email "<email address>"

# Set GPG signing key
$ git config --global user.signingkey "<gpg/pgp key id>"

# Show Git username
$ git config user.name

# Show Git configuration
$ git config --list
6.3.2 Syncing Local and Remote GitHub Repo
# Add all file contents in the current directory to the index
$ git add .

# Permanently record file snapshots in version history
$ git commit -m "Message"

# Upload local branch commits to the remote repository
$ git push

# Download version history
$ git fetch <github repo>

# Combine <github repo>/<branch name> into current local branch
$ git merge <github repo>/<branch name>

# Avoid merge commits and reset the index and working tree
$ git reset --hard HEAD

# Undo N commit(s) to reset the current HEAD branch
#    N is a positive integer
#    --soft: to preserve the undone revisions
$ git reset --soft HEAD~N
#    --hard: to delete the undone revisions
$ git reset --hard HEAD~N

# Download and incorporate remote changes
$ git pull

## If updates, with commit(s), are rejected
$ git pull --rebase
6.3.3 A Tad More on Commits
# View the commit history
$ git log
# Or,
$ git log --stat
# Or,
# ---------------------------------- #
#     %H : commit hash               #
#     %an: name of the author        #
#     %ar: author date (relative)    #
#     %s : comment                   #
# ---------------------------------- #
$ git log --pretty=format:"%H - %an, %ar : %s"

# Compare any two git commits
$ git diff <commit 1 hash> <commit 2 hash> > diffoutput.txt
6.3.4 Git Branches
# List all branches (local/remote)
$ git branch -a

# List only remote branches
$ git branch -r

# Show branches and their commits
$ git show-branch

# Switch to <branch-name>
$ git checkout <branch-name>

# Merging <branch-name> to master
$ git checkout master
$ git merge <branch-name>
6.4 Docker Stuff
6.4.1 Useful Commands
# Log in to terminal using access token
$ docker login --username <username>

# How to Start Docker

# ## (The correct way to start docker is to use systemd/systemctl):
$ systemctl enable docker
$ systemctl start docker

# ## How to Start/Check/Stop Docker Daemon
$ service docker start
$ service docker status
$ service docker stop

# Building an Image
$ docker build -t  <username>/<image-name>

# docker run Example
$ docker run --rm -ti ubuntu sleep 5

# ## Remove or Delet ALL
$ docker rm $(docker ps -a -q)

# ## Running Processes:
$ docker ps --format $FORMAT

# ## Last Container:
$ docker ps -l --format=$FORMAT

# ## List of All Containers:
$ docker ps -a --format=$FORMAT

# Listing Ports
$ docker port <container-name>
6.4.2 Container
# How to Search for a Docker Image
$ docker  search <WHATEVER YOU WANT TO SEARCH>

# How to Pull/Remove a Docker Image
$ docker  pull <image-name>
$ docker rmi <image-id>

# Creating a Containter From Image

# ## Example
$ docker run -ti <username>/<image-name>:latest bash

# ## Run a Container and Keep it Running Detached:
$ docker run -d -ti ubuntu bash

# ## Attach a Detached Container:
$ docker attach <detached-container-name>

# #-----------------------------------------------------#
# # Detach while a Container is Running:                #
# # CTRL+p then CTRL+q                                  #
# #-----------------------------------------------------#

# ## Add a New Process to a Running Container
$ docker exec -ti <running-container-name> <process-name, e.g. bash>

# ## Checking Container Output
$ docker logs <container-name>

# Example
$ docker run --name <name> -d <image-name> <process-name> -c “<your-command>”

# Stop/Delete/Restart a Container

# ## Stop
$ docker kill <container-name>

# ## Stop ALL
$ docker stop $(docker ps -a -q)

# ## Remove or Delete
$ docker rm <container-name>

# Restart a Stopped Container (--> Then "Attach" to Access the Terminal)
$ docker start <container-id>

# Creating a New Image from a Container
# ## Example:
$ docker commit <container-name> <new-image-name>

$ docker commit <container-id>
$ docker tag <new-image-id> <new-image-name>
6.4.3 Data Sharing and Backups
# Copy File/Directory Between Container (Stopped or Running) and Host
# ## To stream a tar archive (from stdin or stdout) include "-" for <source-file-or-directory-path> or <destination-path>

$ docker cp <container-id>:<container-source-file-or-directory-path> <destination-path-in-local-filesystem>|-
$ docker cp <source-path-in-local-filesystem> <container-id>:<container-destination-file-or-directory-path>

# Save Docker Image in ./
$ docker save --output ./<image-name.tar> <image-name>:latest

# ## Alternatively:
$ docker save  <image-name>:latest > <image-name.tar>

# Load Docker Image from ./
$ docker load --input ./<image-name.tar>

# ## Alternatively:
$ docker load < ./<image-name.tar>

# Shared Directory Using Bind Mounts
$ docker run \
    --name=<your-container-name> -it \
    --mount type=bind,source=<path-to-shared-volume-on-host>,destination=<path-to-shared-volume-in-container> \
    <username>/<image-name>:latest <process-name>

# Shared Directory Using Docker Volume
# ## Use $PWD (for current directory) or <path-to-shared-directory-on-host>
$ docker run \
    --name=<your-container-name> \
    -it -v "$PWD":<path-to-shared-directory-in-container> \
    <username>/<image-name>:latest <process-name>

# Using Ports
# ## Include "--rm" to kill the container in the end
# ## xxxx:yyyy <-- x and y represent host and container respectively
$ docker run \
    --rm -it -p 8888:8888 \
    -v "$PWD":<path-to-shared-directory-in-container> \
    <username>/<image-name>:latest <process-name>
6.5 GPG/PGP Encryption
6.5.1 Configuration
# Restart gpgconf
$ gpgconf --kill gpg-agent
6.5.2 Creating a GPG Master Key
# Generate the primary or master key
$ gpg --expert --full-gen-key

# 01) Select 1
#     Default option:
#     Masterkey for signing and certification (SC)
#     A subkey for encryption (E)
# 02) Select the size of masterkey
# 03) Select the size of subkey
# 04) Specify the validity period of the key
# 05) Confirm
# 06) Provide name, email address, and a comment
# 07) Select O
# 08) Enter passphrase
# 09) Confirm passphrase

# Check the fingerprint
$ gpg --fingerprint

# Check available public keys in your local machine
$ gpg --list-keys
# Or, more convenient:
$ gpg -k

# Check available secret keys in your local machine
$ gpg --list-secret-keys
# Or, more convenient:
$ gpg -K

#----------------------------------------------------------------------#
# NOTE: Last 8 characters of the fingerprint is the short ID or Key ID #
#----------------------------------------------------------------------#
6.5.3 Deleting GPG Keys
6.5.4 Adding/Revoking/Deleting UID
# First do this:
$ gpg --edit-key <key id>

## Or,
$ gpg --expert --edit-key <key id>

# To add a uid
gpg> adduid
#   Provide name, email address, and a comment
#   To save enter "O"
#   Provide your passphrase

# Revoke a uid
#   To list existing uids
gpg> uid
#   Select the uid to be revoked (from the numbered sequence of uids in the output)
gpg> <uid number>
#   Use the command to revoke uid
gpg> revuid
#   Select your reason by entering appropriae number/character
#   Provide optional description, or hit enter for an empty line
#   Confirm by entering 'y' when asked

# Delete a uid
#   To list existing uids
gpg> uid
#   Select the uid to be deleted (from the numbered sequence of uids in the output)
gpg> <uid number>
#   Used the command to delete uid
gpg> deluid
#   Confirm by entering 'y' when asked

# Save and exit
gpg> save
# Or, quit without saving
gpg> quit
6.5.5 Adding a Subkey
OpenPGP supports subkeys. Subkeys are independent key pairs, automatically linked to the master key pair. They can be revoked or stored separately without involving the master key.
GnuPG utilizes a signing-only key as the master key, and automatically generates a subkey for encryption.
# First do this:
$ gpg --edit-key <master key id>

## Or,
$ gpg --expert --edit-key <master key id>

# Add a subkey
gpg> addkey
#   Provide your passphrase
#   Select RSA (sign only), or RSA (encrypt only)
#   Select key size
#   Specify the validity period of the subkey

# Save and exit
gpg> save
6.5.6 Exporting/Importing Keys
- Export
# Extract the GPG keys
$ gpg --export <key id> > <filename.gpg>

# Extract the GPG public key in ASCII format using --armor
$ gpg --export --armor <key id> > <filename-PUBLIC.asc>

# Extract the GPG secret key in ASCII format using --armor
$ gpg --export-secret-keys --armor <key id> > <filename-SECRET.asc>
- Import
# Import the GPG public/secret key
$ gpg --import <filename-PUBLIC.asc>
# Or,
$ gpg --import <filename-SECRET.asc>

# Import updates only
$ gpg --import <filename.asc> --merge-options merge-only
- Import a GPG/PGP public key from key server
# First, find the public GPG key
$ gpg <sig-filename.sig>
# Import the key
#    For a specific key server, use --keyserver <server>
$ gpg --receive-key <key id>
# Or,
$ gpg --recv-key <key id>
#    Example:
$ gpg --keyserver hkp://ipv4.pool.sks-keyservers.net --recv-key <key id>
6.5.7 Asymmetric Encryption with GPG
# Encrypt with GPG public key
$ gpg --encrypt --recipient <key id> ./<tarballname.tar.gz>
# Or,
$ gpg -e -r <key id> ./<tarballname.tar.gz>

# Enter the relevant passphrase when you are asked for it
$ gpg --output <output.name> --decrypt ./<tarballname.tar.gz.gpg>
# Or,
$ gpg -o <output.name> -d ./<tarballname.tar.gz.gpg>
6.5.8 File Splitting and Symmetric Encrypton with GPG
- Splitting a file
# Splitting a file (e.g., filename-SECRET.asc) in N number of parts
#   For macOS, split command does not work. Do this:
#   $ brew install coreutils
#   Use gsplit instead of split
# -a for specifying suffix length---number of digits or letters
# -n for number of parts wanterd
# -d for digits as suffix
$ gsplit -a N -n N -d <filename-SECRET.asc> <filename-suffix->
# Replace N with a positive integer
#   Also, N could be different for -a and -n options

# Join the N parts of filename-SECRET.asc to get its original version
$ cat <filename-suffix-*> > <filename-SECRET.asc>
- Symmetric Encryption with GPG
# Symmetric encrypton with gpg uses the same passphrase for encryption and decryption
# -o for specifying output filename
# --force-mdc for integrity protection
# --sign for signing the filename-SECRET-N with GPG key pair
#   Replace N with the appropriate numerical suffix, an integer here
# --cipher-algo AES256 for using AES 256 encryption
# --symmetric for symmetric encrypton---same passphrase for encryption and decryption
$ gpg -o filename-SECRET-N.gpg --force-mdc --sign --default-key <key id to be signed with> --cipher-algo AES256 --symmetric filename-SECRET-N

# Decrypt using the relevant passphrase
#   Look for signature information---signed key ID and good signature in output
$ gpg --output filename-SECRET-N --decrypt filename-SECRET-N.gpg
6.6 Keybase Stuff
6.6.1 Manage Keybase PGP Keys
# Manage Keybase PGP keys
$ keybase pgp

# Help with GPG/PGP stuff on Keybase
$ keybase pgp help
6.6.2 Create an Encrypted Repository
# Go to desired directory
$ cd <path to desired directory>

# Log in to your keybase account, if not logged in already
$ keybase login

# Create the encrypted remote repository
$ keybase git create <encrypted directory name>

# Clone it anywhere
$ git clone keybase://private/<keybase id>/<encrypted directory name>

# Add it as a remote to an existing repo
$ git remote add origin keybase://private/<keybase id>/<encrypted directory name>
6.8 Email Stuff
6.8.1 Sieve Filter Template
require ["include", "environment", "variables", "relational", "comparator-i;ascii-numeric", "spamtest"];
require ["fileinto", "imap4flags"];

# To avoid conflicts with <DIRECTORY NAME> directory
if allof (address :all :comparator "i;unicode-casemap" :contains ["To", "Cc", "Bcc"] "email1@example1.com"){
    fileinto "<DIRECTORY NAME>";
} elsif anyof (address :all :comparator "i;unicode-casemap" :contains ["To", "Cc", "Bcc"] ["email2@example2.com", "email2@example3.com"], address :all :comparator "i;unicode-casemap" :contains "From" "@example4.com") {
    fileinto "<DIRECTORY NAME>";
    addflag "\\Flagged";
    keep;
# To avoid conflicts with <DIRECTORY NAME> directory
} elsif allof(anyof (address :all :comparator "i;unicode-casemap" :contains ["To", "Cc", "Bcc"] ["email3@example5.com", "email4@example6.com"]), anyof(address :all :comparator "i;unicode-casemap" :contains ["From", "Cc", "Bcc"]["email5@example7.com", "email5@example8.com", "email5@example9.com"])) {
    fileinto "<DIRECTORY NAME>";
    fileinto "<LABEL NAME>";
} else {
}
7 NETWORKING+
7.1 Back to PROLOGUE
7.2 IP Address
7.2.1 macOS
# Local IP Address: Wireless
$ ipconfig getifaddr en0

# Local IP Address: Ethernet
$ ipconfig getifaddr en1

# Local IP Address: Thunderbolt to Ethernet
$ ipconfig getifaddr en3

# Public IP Address
$ curl https://ipecho.net/plain; echo
7.2.2 Linux
# Local IP Address
$ ip a

# Local IP Address: Internet Protocol Version 4 (IPv4)
$ ip -4 addr

# Local IP Address: Internet Protocol Version 6 (IPv6)
$ ip -6 addr
7.3 Basics
7.3.1 netstat
$ netstat -n
7.3.2 TCP/IP Model
- Layer 1: Physical Layer
- Transmits Data:
- Optically (fiber optic cables) or
- Electrically (twisted pair cables) or
- Via Radio Waves (wireless network)
- Optically (fiber optic cables) or
- Transmits Data:
- Layer 2: Data Link Layer
- Protocols/Standards
- LAN Standards: Ethernet, MAC (Media Access Control) addresses, etc.
- NOTE: MAC addresses are binary numbers shown in the hexadecimal form
- LAN Standards: Ethernet, MAC (Media Access Control) addresses, etc.
- Protocols/Standards
- Layer 3: Network Layer
- Protocols/Standards
- IP (Internet Protocol): IP version 4 (IPv4) and IP version 6 (IPv6)
- ICMP (Internet Control Message Protocol)
- ARP (Address Resolution Protocol)
- RARP (Reverse Address Resolution Protocol)
- IGMP (Internet Group Management Protocol)
- IP (Internet Protocol): IP version 4 (IPv4) and IP version 6 (IPv6)
- Protocols/Standards
- Layer 4: Transport Layer
- Protocols/Standards
- Transmission Control Protocol (TCP): more reliable, requires connection
- User Datagram Protocol (UDP): faster, requires no connection
- Stream Control Transmission Protocol (SCTP): resilient and more reliable
- Transmission Control Protocol (TCP): more reliable, requires connection
- Protocols/Standards
- Layer 5: Application Layer
- Protocols/Standards
- DNS (Domain Naming System): 53 [TCP/UDP]
- HTTP (Hypertext Transfer Protocol): 80 [TCP/UDP]
- Telnet: 23 [TCP/UDP]
- SSH (Secure Shell): 22 [TCP/UDP/SCTP]
- FTP (File Transfer Protocol): 21 [TCP/UDP/SCTP]
- TFTP (Trivial File Transfer Protocol): 69 [TCP/UDP]
- SNMP (Simple Network Management Protocol): 161 [TCP/UDP]
- SMTP (Simple Mail Transfer Protocol): 25 [TCP/UDP]
- DHCP (Dynamic Host Configuration Protocol): 546 for v6 Client, 547 for v6 Server [TCP/UDP]
- RDP (Remote Desktop Protocol)
- X Windows: 6000—6063 [TCP/UDP]
- DNS (Domain Naming System): 53 [TCP/UDP]
- Protocols/Standards
7.3.3 Port Number
- Port Number: A standard number assigned to access a particular application/service
- IP address allows the computer/node to receive the data.
- Port number tells which application the data should go to
- IP address allows the computer/node to receive the data.
- Example: [IP Address:Port Number] xx.x.xx.x:xxxxx
- [Client To Server] Destination Port (HTTP/Web Server): 80
- [Client To Server] Source Port: <Random Number (xxxxx)>
- [Server To Client] Destination Port: <Random Number (xxxxx)>
- [Server To Client] Source Port (HTTP): 80
- [Client To Server] Destination Port (HTTP/Web Server): 80
- Well Known Port Numbers: 0 - 1023
- Registered Port Numbers: 1024 - 49151
- Dynamically Assigned Port Numbers: 49152 - 65535